
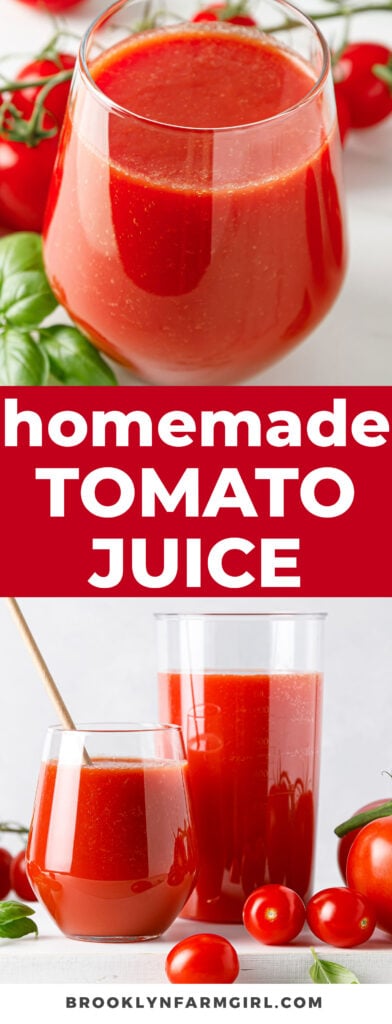
Ready, set, blend — It doesn’t get any easier or fresher than this homemade tomato juice recipe! Made with only 2 ingredients — fresh tomatoes and celery salt — and ready in just 1 minute from start to finish. Full canning instructions detailed below as well.
Easy Fresh Tomato Juice
You only need 2 ingredients to make fresh tomato juice — ripe tomatoes and a little celery salt, that’s it! Forget the store-bought stuff and make your own at home for a refreshing, garden-fresh drink packed with real tomato flavor.
As a kid, I loved sipping tomato juice on hot summer days, and now my kids do too! This simple, nostalgic treat is one of my favorite ways to enjoy fresh tomatoes from our garden, along with recipes like my Ooey Gooey Tomato and Bacon Grilled Cheese and Simple Garlicy Tomato Pasta .
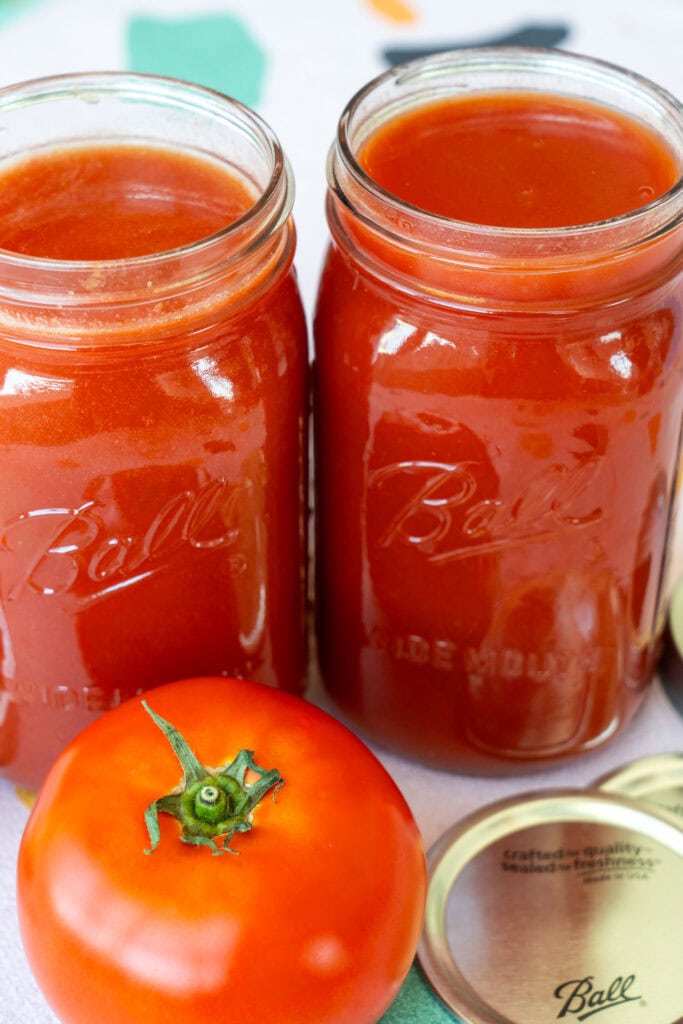
Have lots of garden tomatoes? Canning tomato juice is so easy! At the bottom of this post I will supply you full water bath canning instructions! For every 20 pounds of tomatoes, you will be able to can 7 quarts, or 14 pint jars of tomato juice.
What type of tomatoes are best for tomato juice?
You want juicy tomatoes to make a good tomato juice! I recommend beefsteak tomatoes, but a juicy plum/roma will also work if that’s what you’re growing. As always, it will taste best with fresh Summer time garden tomatoes!
Note: The color of the tomato juice depends on the the color and juiciness of the tomatoes. I find that peak Summer time beefsteak tomatoes result in a deep rich red color, while early plum tomatoes are more paler in color.

How to Make Homemade Tomato Juice
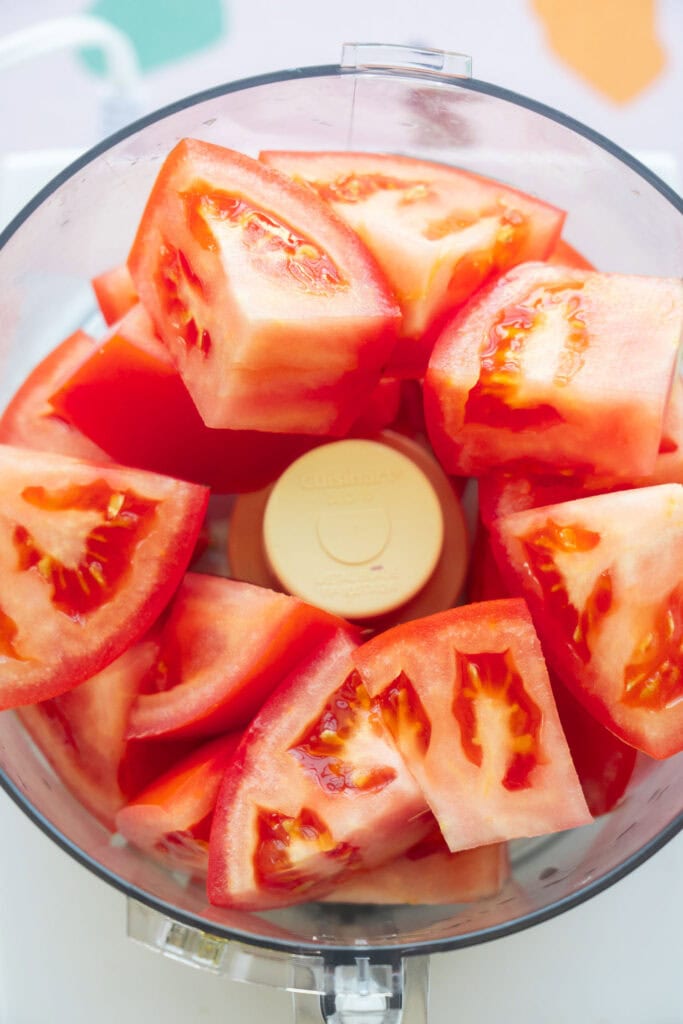
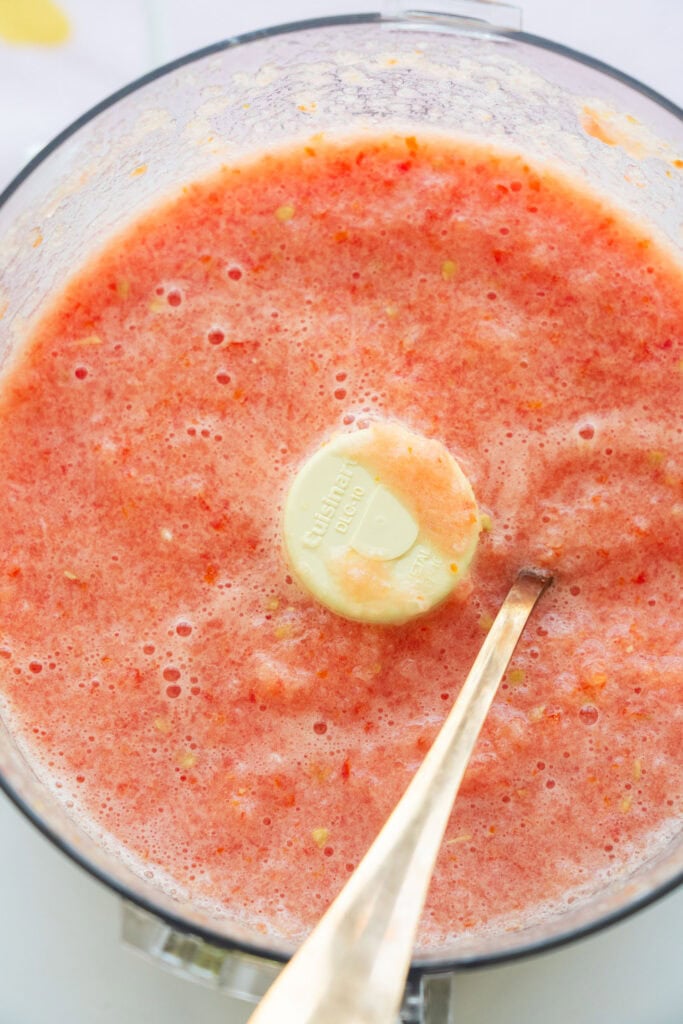
Chop tomatoes up and place in food processor or blender.
Pulse until smooth. The top will look pulpy and seedy but we’re going to smooth that out.
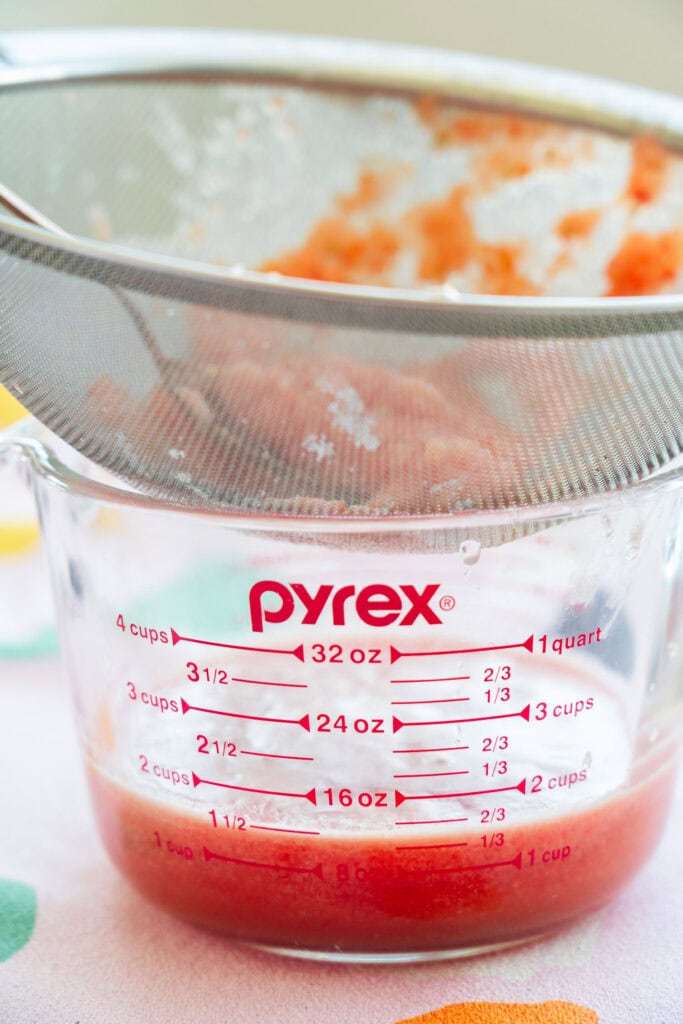
Use a fine mesh strainer or cheesecloth , placing it over a cup or bowl and pour the tomato mixture into it. The goal is to use something that will make sure the seeds don’t get through. To quicken the process, press down with a spoon, so the juice squeezes out. Discard the tomatoes on top of cheesecloth (compost them!).
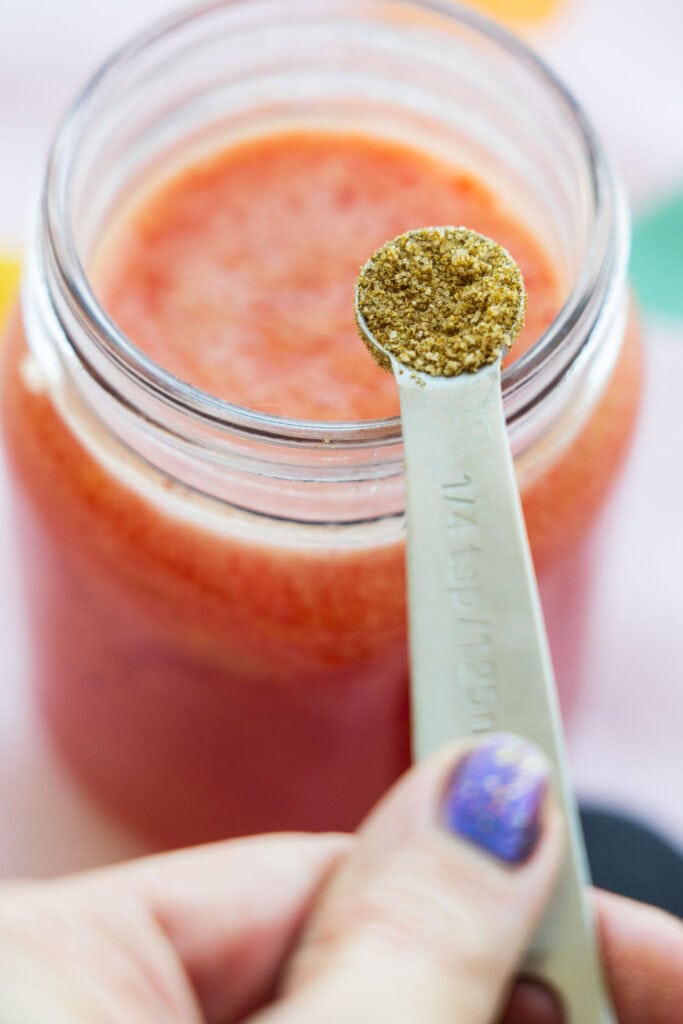
Add celery salt into the cup and stir. Bonus: Want a little kick to your tomato juice? Add a pinch of cayenne or black pepper to the cup too!
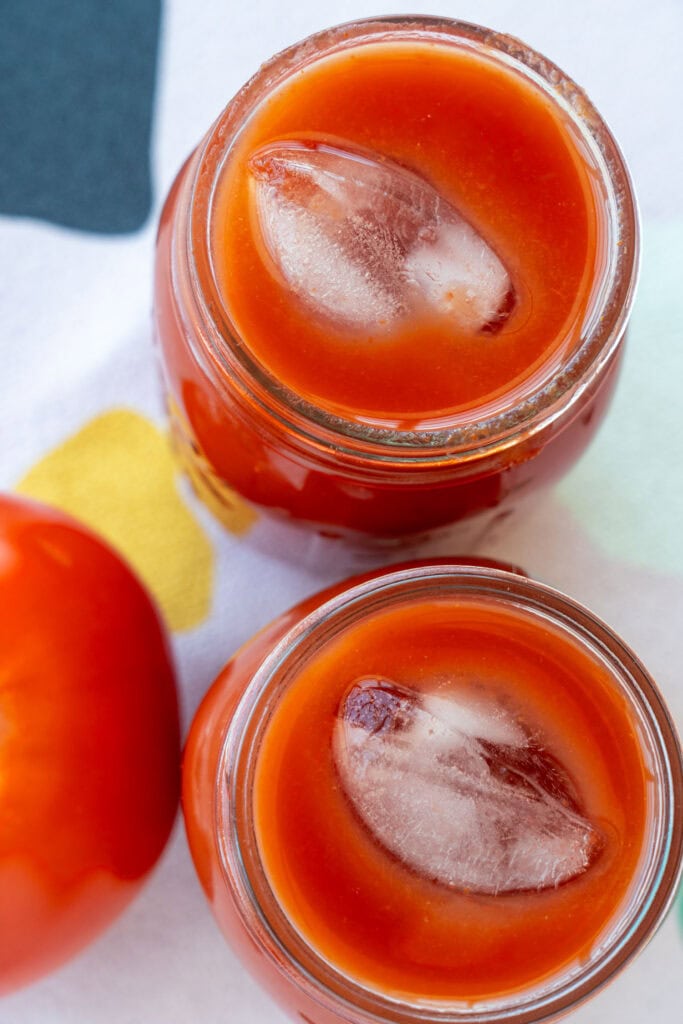
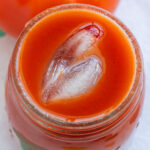
Serve and enjoy your fresh tomato juice! I like adding a couple ice cubes to serve mine chilled. You can even get fancy and add a garnish on top, like a celery stick, fresh parsley or basil.

How to Can Tomato Juice
You can easily can tomato juice in a water bath. When we’re picking lots of tomatoes, I make a few batches of canned tomato juice. For about 20 pounds of tomatoes, you will be able to can 7 quarts, or 14 pint jars.
Here’s my step by step instructions:
- Sterilize jars and add water to the canner, starting to heat up the water.
- Quarter tomatoes and add to the food processor or blender and blend until smooth, and then pour over large bowl, using a cheesecloth or mesh sieve to remove any seeds/ chunky leftover parts. You will most likely need to do this in a few batches if you’re canning 10+ pounds of tomatoes.
- Add tomato juice to jars, leaving 1/2 inch headspace. For every quart, add 1 teaspoon of celery salt (or 1/2 teaspoon per pint).
- To can, we need to add acidity to the jars. Add 2 tablespoons of lemon juice to each quart (or 1 tablespoon per pint). You will not be able to taste the lemon juice.
- Stir to fully combine, and then wipe the rims of the jars clean.
- Put your lids and screw bands on.
- Add tomato juice on canner rack, lowering it into hot water. Jars should be covered by 2 inches of water, if not, add more water.
- Place lid on canner pot, turn heat up and bring to a active boil (but not too much – it shouldn’t be splashing outside of the pot).
- Process according to your altitude and jar size:
Processing time for water bath pints jars.
0-1,000 ft – 35 minutes 1,001-3,000 ft – 40 minutes 3,001-6,000 ft – 45 minutes 6,001 ft and above – 50 minutes
Processing time for water bath quart jars: 0-1,000 ft – 40 minutes 1,001-3,000 ft – 45 minutes 3,001-6,000 ft – 50 minutes 6,001 ft and above – 55 minutes
- Turn heat off, remove lid and allow the jars to rest for 5 minutes before carefully removing the jars from the pot.
- Move jars to counter, and allow to sit overnight. The next day, check the seals and then store in a dark pantry.

How to Store Tomato Juice
Fresh: Store leftover tomato juice in a mason jar with lid, or covered cup, in the refrigerator. Tomato Juice is good for 4-5 days in the refrigerator.
Canned: Store canned tomato juice in a dark pantry or cabinet. Properly sealed canned tomato juice is good for a year.
Pin for later:

Ingredients
- ▢ 2 large tomatoes (beefsteak works best, but can also use plum) stem removed, chopped into quarters
- ▢ 1/4 teaspoon celery salt
Instructions
- Place tomatoes in a food processor or blender and pulse until liquid and smooth.
- Place a fine mesh strainer or cheesecloth over a cup or bowl and pour tomato mixture over it, collecting the liquids in the cup. To attach the cheesecloth to the cup I like to use a rubber band. To speed up the process, press tomato liquid down with a spoon. Discard any tomato pieces on top (compost them!).
- Add celery salt into cup and stir. If serving chilled, add a couple of ice cubes to cup. Serve and enjoy this delicious tomato juice!
How to Can Tomato Juice
- For about 20 pounds of tomatoes, you will be able to can 6 quarts or 12 pint jars.
- Sterilize jars and add water to the canner pot, starting to heat the water up.
- Quarter tomatoes and add to the food processor or blender and blend until smooth, and then pour over large bowl, using a cheesecloth or mesh sieve to remove any seeds/ chunky leftover parts. You will most likely need to do this in a few batches.
- Add tomato juice to jars, leaving 1/2 inch headspace.
- For every quart jar, add 1 teaspoon of celery salt (or 1/2 teaspoon per pint). To can, we need to add acidity to the jars. Add 2 tablespoons of lemon juice to each quart (or 1 tablespoon per pint). Stir to fully combine.
- Wipe the rims of the jars clean. Put the lids and screw bands on.
- Add tomato juice on canner rack, lowering it into hot water. Jars should be covered by 2 inches of water, if not, add more water.
- Place lid on canner pot, turn heat up and bring to a active boil (but not too much – it shouldn’t be splashing outside of the pot).
- Process according to your altitude and jar size: Processing time for water bath pints jars.: 0-1,000 ft – 35 minutes 1,001-3,000 ft – 40 minutes 3,001-6,000 ft – 45 minutes 6,001 ft and above – 50 minutes Processing time for water bath quart jars: 0-1,000 ft – 40 minutes 1,001-3,000 ft – 45 minutes 3,001-6,000 ft – 50 minutes 6,001 ft and above – 55 minutes
- Turn heat off, remove lid and allow the jars to rest for 5 minutes before carefully removing the jars from the pot.
- Move jars to counter, and allow to sit overnight. The next day, check the seals and then store in a dark cabinet or pantry.
2-Ingredient Tomato Juice with Fresh Tomatoes
Ingredients
- 2 large tomatoes (beefsteak works best, but can also use plum) stem removed, chopped into quarters
- 1/4 teaspoon celery salt
Instructions
- Place tomatoes in a food processor or blender and pulse until liquid and smooth.
- Place a fine mesh strainer or cheesecloth over a cup or bowl and pour tomato mixture over it, collecting the liquids in the cup. To attach the cheesecloth to the cup I like to use a rubber band. To speed up the process, press tomato liquid down with a spoon. Discard any tomato pieces on top (compost them!).
- Add celery salt into cup and stir. If serving chilled, add a couple of ice cubes to cup. Serve and enjoy this delicious tomato juice!
How to Can Tomato Juice
- For about 20 pounds of tomatoes, you will be able to can 6 quarts or 12 pint jars.
- Sterilize jars and add water to the canner pot, starting to heat the water up.
- Quarter tomatoes and add to the food processor or blender and blend until smooth, and then pour over large bowl, using a cheesecloth or mesh sieve to remove any seeds/ chunky leftover parts. You will most likely need to do this in a few batches.
- Add tomato juice to jars, leaving 1/2 inch headspace.
- For every quart jar, add 1 teaspoon of celery salt (or 1/2 teaspoon per pint). To can, we need to add acidity to the jars. Add 2 tablespoons of lemon juice to each quart (or 1 tablespoon per pint). Stir to fully combine.
- Wipe the rims of the jars clean. Put the lids and screw bands on.
- Add tomato juice on canner rack, lowering it into hot water. Jars should be covered by 2 inches of water, if not, add more water.
- Place lid on canner pot, turn heat up and bring to a active boil (but not too much – it shouldn’t be splashing outside of the pot).
- Process according to your altitude and jar size: Processing time for water bath pints jars.: 0-1,000 ft – 35 minutes 1,001-3,000 ft – 40 minutes 3,001-6,000 ft – 45 minutes 6,001 ft and above – 50 minutes Processing time for water bath quart jars: 0-1,000 ft – 40 minutes 1,001-3,000 ft – 45 minutes 3,001-6,000 ft – 50 minutes 6,001 ft and above – 55 minutes
- Turn heat off, remove lid and allow the jars to rest for 5 minutes before carefully removing the jars from the pot.
- Move jars to counter, and allow to sit overnight. The next day, check the seals and then store in a dark cabinet or pantry.
Recipe Created by Pamela Reed for brooklynfarmgirl.com
